Welcome to my blog. I hope you enjoy reading about my adventures - in stitch and otherwise! And I hope that you will leave a comment so that I know you have visited.
Saturday, 25 November 2017
FNSI for November
Many thanks to Wendy for hosting our virtual sew-in. You can see what everyone was working on here on Wendy's blog.
I started the afternoon with the intention of adding the borders to my Hexathon quilt.
I had not squared the top up since adding the large plain section and this took a little while! At this point I was winging it a bit so decided to add the plain borders first which I did - just a small pic as it was raining outside and space indoor was at a premium!
At this point I realised that I had miscalculated on the ammount of bias strip that I needed for the coloured flange - by half! So that will have to be a job for another day. I was however able to use the off cuts of border fabric to extend the pieced borders and I have those joined now ready for my next session. Lunch guests tomorrow means that my large work table - ie the dining room table has to be cleared.
So not as much achieved as I had hoped but at least the task has been started and I now know where I am going.
Friday evening called for some relaxing hand sewing so I made this Christmas flower for one of my swap groups.
Now I am looking forward to seeing what everyone got up to. Have a great weekend.
Monday, 20 November 2017
An Open Wide bag
With all my Christmas sewing out of the way I thought it was time that I made myself a present! I have had this gorgeous Chinese Oriental Flower fabric for a few months (thank you Sue) and have been wanting to make it into a bag.
One of these Open Wide bags seemed to be the perfect match.
I had not used this pattern before so, being a good girl, I read through the instructions before I started! There are a lot of them and it all sounded rather complicated but once you get started they are extremely well written and easy to follow.
I made the medium sized bag and used Soft and Stable as the wadding.
I was worried about adding the end pieces and sewing round the curve but they set in perfectly. Adding the binding was not quite so easy. I hand stitched the reverse of the binding - machining round seemed like a step too far and anyway, I prefer the finished look of hand stitching.
The zip went in like a dream although I could not bring myself to cut the zip as per the instructions! However, cutting it once it was sewn in place worked well and I left the end stop in place too as it is covered by the fabric tab. Again, adding the binding over the zip took patience and there was a little reverse stitching here but I got there in the end.
And so here is my lovely new bag.
I am very pleased with the finished bag - the Soft and Stable works really well and is very light although I think for the small version I will use something a little less bulky.
I am linking up with Elm Street Quilts for Bag It 2017
One of these Open Wide bags seemed to be the perfect match.
I had not used this pattern before so, being a good girl, I read through the instructions before I started! There are a lot of them and it all sounded rather complicated but once you get started they are extremely well written and easy to follow.
I made the medium sized bag and used Soft and Stable as the wadding.
I was worried about adding the end pieces and sewing round the curve but they set in perfectly. Adding the binding was not quite so easy. I hand stitched the reverse of the binding - machining round seemed like a step too far and anyway, I prefer the finished look of hand stitching.
The zip went in like a dream although I could not bring myself to cut the zip as per the instructions! However, cutting it once it was sewn in place worked well and I left the end stop in place too as it is covered by the fabric tab. Again, adding the binding over the zip took patience and there was a little reverse stitching here but I got there in the end.
And so here is my lovely new bag.
I am very pleased with the finished bag - the Soft and Stable works really well and is very light although I think for the small version I will use something a little less bulky.
I am linking up with Elm Street Quilts for Bag It 2017
Saturday, 18 November 2017
Christmas Throught The Year
Just popping in with a quick post for CTTY - many thanks to Anthea for hosting this linky.
These two mini quilt wall hangings are the last of my Christmas sewing for this year - whoopee!
Do pop over to Hibiscus Stitches to see the other linkups.
Have a great weekend
These two mini quilt wall hangings are the last of my Christmas sewing for this year - whoopee!
Do pop over to Hibiscus Stitches to see the other linkups.
Have a great weekend
Tuesday, 14 November 2017
A lean EPP Tuesday!
It's EPP Tuesday and sadly I have very little to share! The only EPP I have produced over the last two weeks has been my swap hexies for November.
So do pop over to Hibiscus Stitches to see how Anthea's lovely Scrappy Hexie is coming along and to see what everyone else is working on. Thanks to Anthea for organising the linky.
Friday, 10 November 2017
Friday Finish
It's a grey damp day here in the Dordogne so my Friday Finish came in very handy this morning when we went to the market!
Last week I showed you this picture of my first attempt at Domino knitting.
A week later and I have these.
My thanks to Barbara for letting me have the pattern. I enjoyed working on these and will definitely be making another pair. There are certain improvements that I can see I can make and I will use smaller needles next time as they could be a little snugger. But I am very happy with them as a first attempt.
These two crazy heart sachets have been gifted this week so I can share pictures of them.
These are quick little makes and are great for trying out stitches and using small scraps of fabric.
It looks like we are in for a wet weekend so I have plenty of sewing plans! Hope you have a happy stitchy weekend.
Last week I showed you this picture of my first attempt at Domino knitting.
A week later and I have these.
My thanks to Barbara for letting me have the pattern. I enjoyed working on these and will definitely be making another pair. There are certain improvements that I can see I can make and I will use smaller needles next time as they could be a little snugger. But I am very happy with them as a first attempt.
These two crazy heart sachets have been gifted this week so I can share pictures of them.
These are quick little makes and are great for trying out stitches and using small scraps of fabric.
It looks like we are in for a wet weekend so I have plenty of sewing plans! Hope you have a happy stitchy weekend.
Saturday, 4 November 2017
FNwF November get together
Many thanks to Cheryll for organising our get together again - visit Cheryll's blog here to see what everyone was working on.
I started the afternoon with these two stitcheries that have been awaiting attention for a while now.
By the end of the afternoon (with some garden work in between!) I had these two mini flimsies.
They have both now been layered up and are waiting to be quilted.
In the evening, by the fire, I finished off these two swap flowers
and then I started to play with some knitting. I have long wanted to try some Domino knitting and recently came across a small project that I thought would be great for experimenting. Barbara of The Flashing Scissors showed some lovely Domino mittens on her blog - do go and have a look - and very kindly sent me the pattern. I did not get very far but I think I now have the hang of it. Anyway, here is my progress so far.
Well that was my Friday - I am looking forward to seeing what everyone else was working on. Have a great weekend.
Thursday, 2 November 2017
Time for a change
Towards the end of last week I was starting to feel that I had 'sewing overload' and felt the need to spend some time doing something different. I have not really done any sketchbook work for a while so I was toying with the idea of playing in one of them when along came the DMTV newsletter and I spotted the perfect thing. Handprinted Sketchbooks. So I signed up for the videos and on Monday I made a start.
The idea is that you start off by taking a very large - A1 - sheet of good quality white paper and play around printing and stencilling on to it. Now of course those large sheets of white paper that I put carefully away were nowhere to be found! So instead I laid out 8 sheets of handmade cotton rag paper onto a plastic sheet and printed on to them instead.
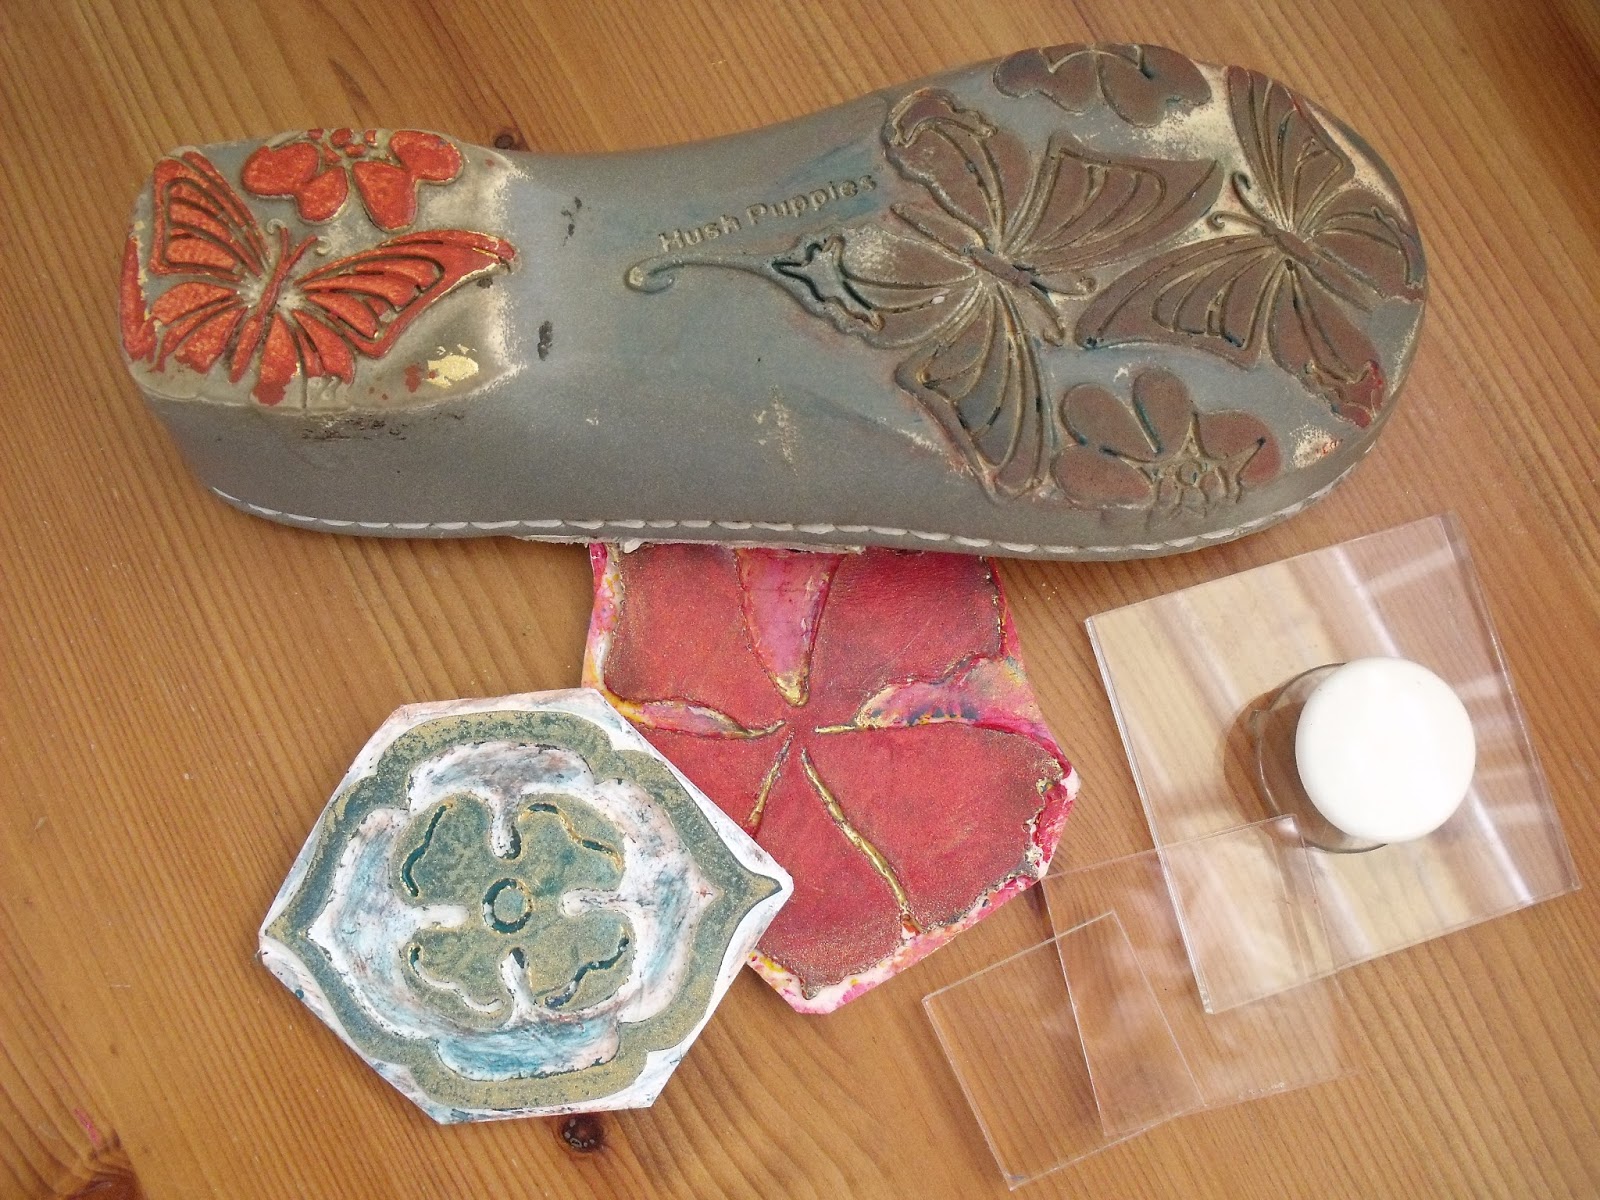
My print blocks - that old sandal has been hanging around for a couple of years waiting for just such an occassion.
So I printed over one side of the paper and left it to dry.
Then I turned the pages over and did some more printing.
Once they were dry came the exciting bit - each page is carefully torn in half. Then the half pages are folded in half and put together four at a time to form the book.
And at this point I was so happy as the pages were looking great all together. The next stage was to stitch the pages together and into some covers and hey presto, one new sketchbook!
It was much quicker and easier than I had thought. I have just used mount board for my covers as I intend to make a fabric slip cover for the book so the board will not be on show.
I am so pleased that I used the rag paper as I love the soft edges it gives to the page - now to pluck up courage to go in and start working into some of the pages!!
It's FNwF tomorrow - still time to sign up so if you fancy joining in then sign up here - hope to see you there.
The idea is that you start off by taking a very large - A1 - sheet of good quality white paper and play around printing and stencilling on to it. Now of course those large sheets of white paper that I put carefully away were nowhere to be found! So instead I laid out 8 sheets of handmade cotton rag paper onto a plastic sheet and printed on to them instead.
My print blocks - that old sandal has been hanging around for a couple of years waiting for just such an occassion.
So I printed over one side of the paper and left it to dry.
Then I turned the pages over and did some more printing.
Once they were dry came the exciting bit - each page is carefully torn in half. Then the half pages are folded in half and put together four at a time to form the book.
And at this point I was so happy as the pages were looking great all together. The next stage was to stitch the pages together and into some covers and hey presto, one new sketchbook!
It was much quicker and easier than I had thought. I have just used mount board for my covers as I intend to make a fabric slip cover for the book so the board will not be on show.
I am so pleased that I used the rag paper as I love the soft edges it gives to the page - now to pluck up courage to go in and start working into some of the pages!!
It's FNwF tomorrow - still time to sign up so if you fancy joining in then sign up here - hope to see you there.
Subscribe to:
Posts (Atom)